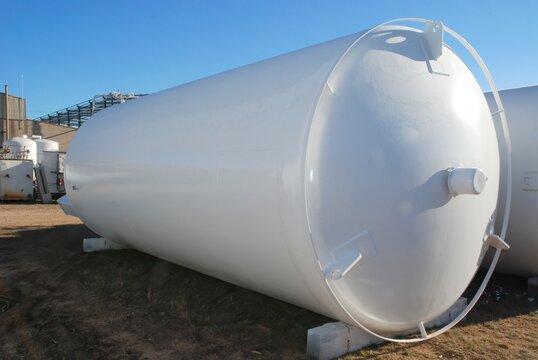

Introduction
Compare the natural gas storage tank to a “super insulated bottle”, and the vacuum layer is its “insulation core”. Once the vacuum fails, even the most expensive storage tank will “sweat, sneeze and lose its temper”. In the following 3 minutes, we will clearly explain 90% of the common problems at the site, the judgment tips and emergency solutions. This will facilitate station managers, operators, purchasers and maintenance personnel to quickly match themselves with the solutions, reducing downtime losses.
Ⅰ.The outer shell shows extensive “sweating” or “frosting”.
Observation: The tank walls look as if they were just taken out of the refrigerator, with water droplets forming lines and frost covering in patches.
Cause: The vacuum layer in the middle has leaked, allowing outside moisture to be “absorbed” and liquefied on the cold tank walls.
Three steps for handling:
Look: First, check for oil stains or bubbles on the turbocharger, liquid level gauge interface, and the base of the safety valve.
Listen: Use an ultrasonic leak detector to scan the weld seam once. The high-frequency buzzing point is the leak location.
Repair: For small holes, use vacuum to inject sealing glue; for large cracks, repair after re-vacuuming; for the sinking of pearl sand, add sand, vibrate and compact before re-vacuuming.
Reminder: Conduct a “vacuum check-up” before the rainy season. It can save 80% of the cost compared to emergency rescue afterwards.
Ⅱ. The internal pressure of the container suddenly rose, triggering the safety valve to open.
Situation: The pressure gauge pointer turned red and the alarm sounded loudly.
The three main culprits:
① Failure of the sandwich vacuum system → Heat rushes in directly, causing the liquid to evaporate violently.
② The pressure relief valve gets stuck → Unable to relieve pressure, resulting in a “pressure explosion”.
③ Electrochemical corrosion at the interface of different types of steel → Small leakage points resemble a “high-pressure cooker with a leak”.
Quick handling:
First, open the manual relief valve to release the pressure. Don’t let the safety valve keep jumping.
If the vacuum gauge returns to zero, immediately start the on-board vacuum pump to “replenish the suction”.
Remove the booster valve and clean the valve core with diesel. If the sticking is severe, replace it directly.
If black and green corrosion pits are found on the copper-stainless steel joint: stop the tank, empty it, and perform argon arc welding for repair. After welding, conduct a 0.8 MPa air tightness test.
Experience: Applying a layer of epoxy coal tar asphalt on the weld seam can delay electrochemical corrosion for more than 3 years.
III. The evaporation rate has significantly increased, and the pointer of the vacuum gauge has fallen off the scale.
Situation: At the same liquid level, it used to last for 3 days, but now it runs out in just 1.5 days.
The culprit: The pearlized sand “evaporates”.
Reason: During the sand filling process, the humidity was high or the particle size was uneven. After operation, the sand particles continuously release water vapor, pulling the vacuum “down”.
Solution:
Close the inlet and outlet valves, and let the tank return to normal temperature.
Connect the vacuum pump and continuously pump for 8 hours. Observe that the vacuum level drops from 10 Pa to below 3 Pa, and does not rebound within 2 hours. This indicates that it is qualified.
If the pumping still causes rebound, open the manhole to replenish new pearl sand. The old sand should be treated as solid waste.
Tips: The moisture content of the new sand upon entry should be less than 0.3%. On-site, stir the sand in a iron pot for 10 minutes to quickly retest the moisture content on-site.
IV. Conducting “three checks and one record” on a daily basis can prevent 90% of faults.
Check Vacuum: Record the vacuum gauge readings during shift changes every day. If the reading drops by more than 20%, report it.
Check Valves: Manually rotate the booster valve and vent valve weekly to ensure there is no sticking.
Check Appearance: After rain, check for “map-like” water marks on the casing. Take a photo immediately → upload → file it.
Record: Create an Excel chart with four sets of data: vacuum level, liquid level, pressure, and weather. Any abnormal fluctuations can be identified at a glance.
V. When is it necessary to seek professional manufacturers?
In any of the following situations, stop “trying things out on your own”:
The vacuum level failed to return to below 5 Pa for 24 consecutive hours;
Longitudinal welds of the tank body showed cracks over 5 cm in length;
The safety valve jumped more than 3 times in a row, suggesting leakage in the inner cylinder;
After earthquakes, fires, or impacts, the geometric deformation of the tank body exceeded 1%.
Package the on-site photos, vacuum records, and pressure curves and send them to the original manufacturer. Within 48 hours, a “repair or return for factory” solution will be provided to avoid any secondary safety incidents.
Conclusion
The “colds” of natural gas storage tanks are mostly related to the interlayer vacuum. Remember this mnemonic:
“Check for leaks when the exterior freezes, release pressure when it surges, remove sand when the evaporation increases, and review the data every day.”
By following these steps, the downtime due to faults can be reduced by 70%, and the annual maintenance cost can be saved by the equivalent of a pickup truck. If you have any questions, please contact us through the website.